Installing Feature
Start-->Run-->cmd
cd C:\Program Files\Common Files\Microsoft Shared\web server extensions\12\BIN>
C:\Program Files\Common Files\Microsoft Shared\web server extensions\12\BIN>stsa
dm.exe -o installfeature -name DemoFeature -force
DemoFeature :Feature fodler name in the /features
Activating Fature
2 ways we can activate feature
1)From comand promt
2)from sharepoint site
From command promt:
C:\Program Files\Common Files\Microsoft Shared\web server extensions\12\BIN>stsa
dm.exe -o activatefeature -name DemoWorkflowfeature -url http://jagadeeshv:9999
-force
From Sharepoint site:
Site actions--> if scope="web"
find site features
if scope="Site"
go to Site collection features
Find Feature title and click on activate
Showing posts with label Features. Show all posts
Showing posts with label Features. Show all posts
Monday, July 19, 2010

Finding List ID in sharepoint
•Navigate to the SharePoint list using the browser.
•Select the Settings + List Settings menu command.
•Copy the Url from the browser address bar into Notepad. It will look something like:
http://moss2007/ProjectX/_layouts/listedit.aspx?List=%7B26534EF9%2DAB3A%2D46E0%2DAE56%2DEFF168BE562F%7D
•Delete everying before and including “List=”.
•Change “%7B” to “{”
•Change all “%2D” to “-“
•Chnage “%7D” to “}”
You are now left with the Id:
{26534EF9-AB3A-46E0-AE56-EFF168BE562F}
•Select the Settings + List Settings menu command.
•Copy the Url from the browser address bar into Notepad. It will look something like:
http://moss2007/ProjectX/_layouts/listedit.aspx?List=%7B26534EF9%2DAB3A%2D46E0%2DAE56%2DEFF168BE562F%7D
•Delete everying before and including “List=”.
•Change “%7B” to “{”
•Change all “%2D” to “-“
•Chnage “%7D” to “}”
You are now left with the Id:
{26534EF9-AB3A-46E0-AE56-EFF168BE562F}
Creating Event receiver as a Feature for Sharepoint List
1)Go to The below path
C:\Program Files\Common Files\Microsoft Shared\web server extensions\12\TEMPLATE\FEATURES
2)Create New Folder name called like
3)IN that folder Create two xml files
a)Feature.xml
b)Elements.xml
Note:(if you dont have option to create xml you can create .txt and rename like Feature.xml)
4)Open Feature.xml file and write the below code.
Scope="Web"
Title="EventReceivers_TempTasks"
Hidden="FALSE"
Version="1.0.0.0"
Description="Activate Feature">
In the above code
ID=New GUID(you can create new guid using visual studio--> tools-->GUID
Scope=Creating feature for scope of the sharepoint portal ,whether it is sitecolection or subsite. If it is "Web"-->Avalable for subsite
"Site"-->Available for site collection
Title=Title of the Feature Name it will display while activating
In the Elements manifests we will add elemensts avaialble in that feature.
In this example we have only one elemensts.xml
if we have two elements.xml files we need to add that elements as like below
Note:The name of the element file name might have any name like sample.xml or test.xml
5)Save and close Feature.xml file
6)open the Elements.xml file and write the below code
ItemAdding
ItemAdding
10001
DemoEventReceivers, Version=1.0.0.0, Culture=neutral, PublicKeyToken=d4e8eb189dba459d
DemoEventReceivers.ClassName
In the above code we are writing event for type tasks List,
Type of ID for Tasks is "107"
ListTemplateOwner is event for particular list Here we will mention list ID
ListTemplateOwner="{D8632C31-D30F-4749-857E-ADFBA1BC4751}"
(Note:Finidng list ID:)
Type: event for list
:Event recevier(Dll) for the list
(Note:Creating dll for the list
)
7)Save and close elements.xml
Creating Feature is complete
To Install and Activate Feature
C:\Program Files\Common Files\Microsoft Shared\web server extensions\12\TEMPLATE\FEATURES
2)Create New Folder name called like
3)IN that folder Create two xml files
a)Feature.xml
b)Elements.xml
Note:(if you dont have option to create xml you can create .txt and rename like Feature.xml)
4)Open Feature.xml file and write the below code.
Scope="Web"
Title="EventReceivers_TempTasks"
Hidden="FALSE"
Version="1.0.0.0"
Description="Activate Feature">
In the above code
ID=New GUID(you can create new guid using visual studio--> tools-->GUID
Scope=Creating feature for scope of the sharepoint portal ,whether it is sitecolection or subsite. If it is "Web"-->Avalable for subsite
"Site"-->Available for site collection
Title=Title of the Feature Name it will display while activating
In the Elements manifests we will add elemensts avaialble in that feature.
In this example we have only one elemensts.xml
if we have two elements.xml files we need to add that elements as like below
Note:The name of the element file name might have any name like sample.xml or test.xml
5)Save and close Feature.xml file
6)open the Elements.xml file and write the below code
In the above code we are writing event for type tasks List,
Type of ID for Tasks is "107"
ListTemplateOwner is event for particular list Here we will mention list ID
ListTemplateOwner="{D8632C31-D30F-4749-857E-ADFBA1BC4751}"
(Note:Finidng list ID:)
Type: event for list
(Note:Creating dll for the list
)
7)Save and close elements.xml
Creating Feature is complete
To Install and Activate Feature
Subscribe to:
Posts (Atom)
Content Editor Webpart not showing up in SharePoint Online ------------------------------------------------------------------------------...
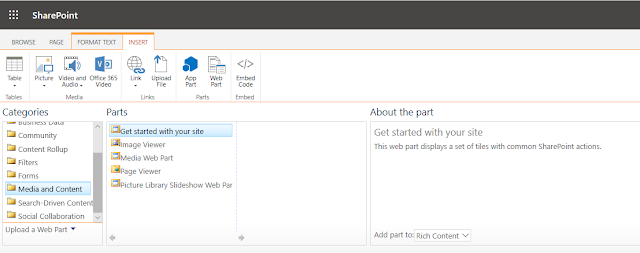
-
 Ribbon missing in Share point online Pages to add custom web part : --------------------------------------------------------------------...
-
 Content Editor Webpart not showing up in SharePoint Online ------------------------------------------------------------------------------...
-
Sharepoint Online Management Shell ------------------------------------------------------------------------------------------------------...