1)Create Class Library project using visual studio
2)Add reference-->browse
C:\Program Files\Common Files\Microsoft Shared\web server extensions\12\ISAPI
select Microsoft.sharepoint.dll
3)Add namespace
using Microsoft.SharePoint;
4)Inherit SPItemEventReceiver class like below
public class EventReceiversForDemolistinCMS:SPItemEventReceiver
{
}
5)Override Method properties as per our requirement.
public class EventReceiversForDemolistinCMS:SPItemEventReceiver
{
public override void ItemAdding(SPItemEventProperties properties)
{
}
public override void ItemAdded(SPItemEventProperties properties)
{
}
public override void ItemUpdating(SPItemEventProperties properties)
{
}
public override void ItemUpdated(SPItemEventProperties properties)
{
}
public override void ItemDeleting(SPItemEventProperties properties)
{
}
public override void ItemDeleted(SPItemEventProperties properties)
{
}
}
6)Here i am taking simple example.I want to raise event for an item when item is added in the list.For that i will override Itemadded event as live below.
public class EventReceiversForDemolistinCMS:SPItemEventReceiver
{
public override void ItemAdding(SPItemEventProperties properties)
{
string strtemp = properties.AfterProperties["Status"].ToString();
if (strtemp != "Completed")
{
properties.ErrorMessage = "Status should be completed";
properties.Cancel = true;
}
}
}
In the above above code getting the value of Status column field while adding item to the list.
properties.AfterProperties["Status"].ToString(); //IT will get Status filed value after ading value in the column.
In the Condition it is checking Status value ,If status value is equal to Completed it will add item to the list,If status couln is not equal to Completed it will raise an error.
7)Add Strong name to the project
right click on project-->properties-->signinig-->
select sign in assembly-->click on dropdown-->New ->any name-->un select protect my key with password-->say ok
8)Build the applciation
9)Find the dll by opening contaiing folder-->bin/debug path
10)Place in GAC
Adding eventreceviers as a feature
Monday, July 19, 2010

Introduction
What are Event Receivers?
SharePoint 2007 Event Receivers are a type of feature which listens for certain events on a site, list or list item. Event Receivers are the MOSS version of document event handlers (also known as Event Sink) in SharePoint V2 technologies (WSS and SPS). Previously the document event handlers were only available for document libaries. Event receivers are now available for any type of list.
What can they be used for?
SharePoint 2007 Event Receivers add behaviours to lists or list items. They are commonly used to perform data validation (beyond SharePoint standard capabilities), to ensure data integrity or to perform a business process.
Definition
Event Receivers have before and after events.
The events relating to a site are:
Before
SiteDeleting
WebDeleting
WebMoving
After
SiteDeleted
WebDeleted
WebMoved
A class needs to inherit from SPWebEventReceiver. The behaviour is defined by overriding a method for one of the above before or after events. You can access properties that relates to the event that the feature is listening using SPWebEventProperties.
The events relating to a list are:
Before
FieldAdding
FieldUpdating
FieldDeleting
After
FieldAdded
FieldUpdated
FieldDeleted
A class needs to inherit from SPListEventReceiver. You define the behaviour by overriding a method for one of the above before or after events. You can access the event properties using the parameter SPListEventProperties.
The events releating to list items are:
Before
ItemAdding
ItemUpdating
ItemDeleting
After
ItemAdded
ItemUpdated
ItemDeleted
ItemAttachmentAdded
ItemAttachmentDeleted
ItemCheckedIn
ItemCheckedOut
ItemFileConverted
ItemFileMoved
ItemUncheckedOut
A class needs to inherit from SPItemEventReceiver. You then override a method for one of the above before or after events. The event properties can be accessed by the local parameter SPItemEventProperties. One of these is the list item. For example:
public override void ItemAdded(SPItemEventProperties properties)
{
SPListItem currentListItem = properties.ListItem;
// other implementation here .....
}
Other important information of the properties object is the AfterProperties and BeforeProperties. AfterProperties provide access to the modified properties. BeforeProperties provide access to the column data before it was changed. This enables you to perform changed based validation.
SharePoint 2007 Event Receivers are a type of feature which listens for certain events on a site, list or list item. Event Receivers are the MOSS version of document event handlers (also known as Event Sink) in SharePoint V2 technologies (WSS and SPS). Previously the document event handlers were only available for document libaries. Event receivers are now available for any type of list.
What can they be used for?
SharePoint 2007 Event Receivers add behaviours to lists or list items. They are commonly used to perform data validation (beyond SharePoint standard capabilities), to ensure data integrity or to perform a business process.
Definition
Event Receivers have before and after events.
The events relating to a site are:
Before
SiteDeleting
WebDeleting
WebMoving
After
SiteDeleted
WebDeleted
WebMoved
A class needs to inherit from SPWebEventReceiver. The behaviour is defined by overriding a method for one of the above before or after events. You can access properties that relates to the event that the feature is listening using SPWebEventProperties.
The events relating to a list are:
Before
FieldAdding
FieldUpdating
FieldDeleting
After
FieldAdded
FieldUpdated
FieldDeleted
A class needs to inherit from SPListEventReceiver. You define the behaviour by overriding a method for one of the above before or after events. You can access the event properties using the parameter SPListEventProperties.
The events releating to list items are:
Before
ItemAdding
ItemUpdating
ItemDeleting
After
ItemAdded
ItemUpdated
ItemDeleted
ItemAttachmentAdded
ItemAttachmentDeleted
ItemCheckedIn
ItemCheckedOut
ItemFileConverted
ItemFileMoved
ItemUncheckedOut
A class needs to inherit from SPItemEventReceiver. You then override a method for one of the above before or after events. The event properties can be accessed by the local parameter SPItemEventProperties. One of these is the list item. For example:
public override void ItemAdded(SPItemEventProperties properties)
{
SPListItem currentListItem = properties.ListItem;
// other implementation here .....
}
Other important information of the properties object is the AfterProperties and BeforeProperties. AfterProperties provide access to the modified properties. BeforeProperties provide access to the column data before it was changed. This enables you to perform changed based validation.
Sunday, July 18, 2010
sharepoint 2010 key features
Key Features•
New User Interface including new Ribbon
•Web Edit
•Silverlight Web Part
•Rich Theming
•Multiple Browser Support
•Visio Services
•SharePoint Designer
•Business Connectivity Services (the evolution of the Business Data Catalog)
•SharePoint Workspace
•Rich Media Support
•Central Administration
New User Interface including new Ribbon
Ribbon interface is contextual and customizable which means you will get an extra Library Tools Tab when you are in a SharePoint document library.
Document Library Tool bar

Edit mode tool bar
Image change and formatting tool bar
This will allow users to select multiple files and perform checkout / check in actions.

Web Edit
Edit your web page directly and get a live preview which is same as office client. This allows you to change common things such as images and text a lot easier than the current one.
Edit Page mode on 2010 and 2007


Live preview same as office client

Change Font Size which provides you with a live preview on font size.

Change images, allow you select images from your PC or from Internet Address and also allow you to select resize the image by drag and drop.

Silverlight Web Part
SharePoint 2010 out of the box comes with Silverlight webpart which allows users to view an interactive rich text content.
New interface to select Webparts:

Silverlight webpart which allow you to Zoom In/Out the content:

Rich Theming
Change SharePoint site's look and feel using PowerPoint themes:

PowerPoint themes preview and color with different font sizes:

Upload the PowerPoint themes you are able to select as SharePoint site theme, then select colour palate display for your preview.

By clicking apply theme, SharePoint site changes to news theme.

Multiple Browser Support
SharePoint supports multiple browsers such as Internet Explorer, Firefox and Safari.

Visio Services
Allows to publish Visio diagrams directly to SharePoint and using browser you can Open Visio diagrams. No Visio client Installation is required.

SharePoint Designer 2010
SharePoint Designer 2010 new UI, enhanced modelling capabilities and improved workflow capabilities makes designers and developers to collaborate seamlessly.

In SharePoint Designer 2010, you will see a new concept Entities handle the back-end integration. SharePoint provides seamless integration with back-end systems.

Central Administration
New improved Central Administration screens...


New User Interface including new Ribbon
•Web Edit
•Silverlight Web Part
•Rich Theming
•Multiple Browser Support
•Visio Services
•SharePoint Designer
•Business Connectivity Services (the evolution of the Business Data Catalog)
•SharePoint Workspace
•Rich Media Support
•Central Administration
New User Interface including new Ribbon
Ribbon interface is contextual and customizable which means you will get an extra Library Tools Tab when you are in a SharePoint document library.
Document Library Tool bar

Edit mode tool bar

Image change and formatting tool bar

This will allow users to select multiple files and perform checkout / check in actions.

Web Edit
Edit your web page directly and get a live preview which is same as office client. This allows you to change common things such as images and text a lot easier than the current one.
Edit Page mode on 2010 and 2007


Live preview same as office client

Change Font Size which provides you with a live preview on font size.

Change images, allow you select images from your PC or from Internet Address and also allow you to select resize the image by drag and drop.

Silverlight Web Part
SharePoint 2010 out of the box comes with Silverlight webpart which allows users to view an interactive rich text content.
New interface to select Webparts:

Silverlight webpart which allow you to Zoom In/Out the content:

Rich Theming
Change SharePoint site's look and feel using PowerPoint themes:

PowerPoint themes preview and color with different font sizes:

Upload the PowerPoint themes you are able to select as SharePoint site theme, then select colour palate display for your preview.

By clicking apply theme, SharePoint site changes to news theme.

Multiple Browser Support
SharePoint supports multiple browsers such as Internet Explorer, Firefox and Safari.

Visio Services
Allows to publish Visio diagrams directly to SharePoint and using browser you can Open Visio diagrams. No Visio client Installation is required.

SharePoint Designer 2010
SharePoint Designer 2010 new UI, enhanced modelling capabilities and improved workflow capabilities makes designers and developers to collaborate seamlessly.

In SharePoint Designer 2010, you will see a new concept Entities handle the back-end integration. SharePoint provides seamless integration with back-end systems.

Central Administration
New improved Central Administration screens...


Wednesday, July 7, 2010
Hiding List columns in newsform.aspx/editform.aspx/dispform.aspx
Open newform.aspx
To get webpart properties to panel add below command to URL
http://sharepointkings/... /Lists/Demo/NewForm.aspx?RootFolder...&Source=…&ToolPaneView=2
Add Content Editor webpart
open source editor and add below code

repalce HideField("Workspace"); with your filed name like HideField("Due Date");
cehck now....
Reference:
http://www.sharepointkings.com/2009/10/hiding-field-in-sharepoint-through.html
http://www.sharepointkings.com/2008/05/how-to-hide-column-of-sharepoint-list.html
http://www.sharepointkings.com/2008/05/how-to-edit-list-forms-like-newformaspx.html
To get webpart properties to panel add below command to URL
http://sharepointkings/... /Lists/Demo/NewForm.aspx?RootFolder...&Source=…&ToolPaneView=2
Add Content Editor webpart
open source editor and add below code

repalce HideField("Workspace"); with your filed name like HideField("Due Date");
cehck now....
Reference:
http://www.sharepointkings.com/2009/10/hiding-field-in-sharepoint-through.html
http://www.sharepointkings.com/2008/05/how-to-hide-column-of-sharepoint-list.html
http://www.sharepointkings.com/2008/05/how-to-edit-list-forms-like-newformaspx.html
Work flow to copy list item from one doucment library to another document library
To create a SharePoint Designer workflow that can move a document from one document library to another:
1.In SharePoint Designer 2007, open the SharePoint site on which the document
library that contains the documents to move is located.
2.On the File menu, select New, and then Workflow.
3.On the Define your new workflow screen of the Workflow Designer,
enter a name for the workflow, select the document library you want to attach
the workflow to (this would be a document library containing documents to move),
select Allow this workflow to be manually started from an item, and click Next.
4.On the Step 1 screen of the Workflow Designer, click Actions, and then click More
Actions from the drop-down menu.
5.On the Workflow Actions dialog box, select List Actions from the category drop-
down list box, select Copy List Item from the actions list, and click Add. The
following text is added to the Workflow Designer:
Copy item in this list to this list
6.On the Step 1 screen of the Workflow Designer, click the first this list
(representing the document library to copy the document from) in the text of the
Copy List Item action.
7.On the Choose List Item dialog box, leave Current Item selected, and click OK.
8.On the Step 1 screen of the Workflow Designer, click the second this list
(representing the document library to copy the document to) in the text of the
Copy List Item action, and select the document library (this is the document
library to where you want to move the document) from the drop-down list box that
appears.
9.On the Step 1 screen of the Workflow Designer, click Actions, and then click
More Actions from the drop-down menu.
10.On the Workflow Actions dialog box, select List Actions from the category
drop-down list box, select Delete Item from the actions list, and click Add.
The following text is added to the Workflow Designer:
then Delete item in this list
11.On the Step 1 screen of the Workflow Designer, click this list in the text
of the Delete Item action.
12.On the Choose List Item dialog box, leave Current Item selected and click
OK. The final text for the workflow should now look like:
Copy item in DocLib1 to DocLib2
then Delete item in DocLib1
where DocLib1 is the SharePoint document library containing the document to move
and DocLib2 the document library to move the document to.
13.On the Step 1 screen of the Workflow Designer, click Finish.
Testing the workflow
1.Go to the SharePoint document library to which you attached the workflow,
click on a document, and select Workflows from the drop-down menu.
2.On the Workflows page, click the name of your SharePoint Designer workflow.
3.On the workflow initiation page, click Start.
When the workflow completes, the document should have moved from the first
SharePoint document library to the second document library.
http://www.documentmanagementworkflowinfo.com/sample-sharepoint-workflows/sharepoint-designer-workflow-move-document-one-library-next.htm
1.In SharePoint Designer 2007, open the SharePoint site on which the document
library that contains the documents to move is located.
2.On the File menu, select New, and then Workflow.
3.On the Define your new workflow screen of the Workflow Designer,
enter a name for the workflow, select the document library you want to attach
the workflow to (this would be a document library containing documents to move),
select Allow this workflow to be manually started from an item, and click Next.
4.On the Step 1 screen of the Workflow Designer, click Actions, and then click More
Actions from the drop-down menu.
5.On the Workflow Actions dialog box, select List Actions from the category drop-
down list box, select Copy List Item from the actions list, and click Add. The
following text is added to the Workflow Designer:
Copy item in this list to this list
6.On the Step 1 screen of the Workflow Designer, click the first this list
(representing the document library to copy the document from) in the text of the
Copy List Item action.
7.On the Choose List Item dialog box, leave Current Item selected, and click OK.
8.On the Step 1 screen of the Workflow Designer, click the second this list
(representing the document library to copy the document to) in the text of the
Copy List Item action, and select the document library (this is the document
library to where you want to move the document) from the drop-down list box that
appears.
9.On the Step 1 screen of the Workflow Designer, click Actions, and then click
More Actions from the drop-down menu.
10.On the Workflow Actions dialog box, select List Actions from the category
drop-down list box, select Delete Item from the actions list, and click Add.
The following text is added to the Workflow Designer:
then Delete item in this list
11.On the Step 1 screen of the Workflow Designer, click this list in the text
of the Delete Item action.
12.On the Choose List Item dialog box, leave Current Item selected and click
OK. The final text for the workflow should now look like:
Copy item in DocLib1 to DocLib2
then Delete item in DocLib1
where DocLib1 is the SharePoint document library containing the document to move
and DocLib2 the document library to move the document to.
13.On the Step 1 screen of the Workflow Designer, click Finish.
Testing the workflow
1.Go to the SharePoint document library to which you attached the workflow,
click on a document, and select Workflows from the drop-down menu.
2.On the Workflows page, click the name of your SharePoint Designer workflow.
3.On the workflow initiation page, click Start.
When the workflow completes, the document should have moved from the first
SharePoint document library to the second document library.
http://www.documentmanagementworkflowinfo.com/sample-sharepoint-workflows/sharepoint-designer-workflow-move-document-one-library-next.htm
Infopath getting error Failed Connection to Data Source

Go to Tools-->Form options in infopath form menu
Select Security and Trust Category
Unselect Automatically determine security level(recomended)
select Full Trust option
click ok
Now Preview the infopath form you won't get that error.
Note:This error will come while getting or submitting data from sharepoint list ,If there is any dataconenction you can get that type of error.
Tuesday, July 6, 2010
TO open infopath form in browser while opening from task list related list item(sharepoint desigern workflow)
1)Open .aspx form in the workflow from Sharepoint designer
2)Find href tag
Replace
href="{substring-before(@WorkflowLink, ', ')}"
to
href="{substring-before(@WorkflowLink,',')}?OpenIn=Browser"
2)Find href tag
Replace
href="{substring-before(@WorkflowLink, ', ')}"
to
href="{substring-before(@WorkflowLink,',')}?OpenIn=Browser"
Subscribe to:
Posts (Atom)
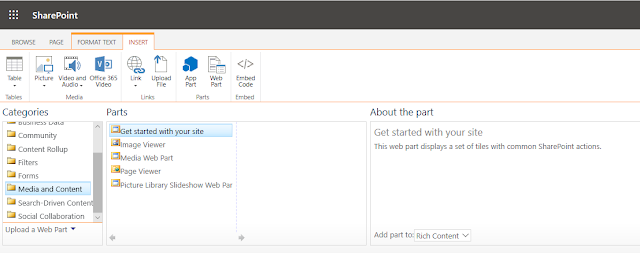
Content Editor Webpart not showing up in SharePoint Online ------------------------------------------------------------------------------...
-
 Content Editor Webpart not showing up in SharePoint Online ------------------------------------------------------------------------------...
 -
Sharepoint Online Management Shell ------------------------------------------------------------------------------------------------------...
-
 Ribbon missing in Share point online Pages to add custom web part : --------------------------------------------------------------------...